Transferring your domain from Wix to WordPress can seem daunting. This process involves several technical steps that need careful attention. Understanding the proper sequence helps ensure a smooth transition. We’ve helped numerous Chicago businesses make this move successfully.
WordPress offers greater flexibility and control than Wix. Many businesses outgrow Wix’s limitations and seek WordPress’s extensive customization options. This comprehensive guide walks you through each step. We’ll help you avoid common pitfalls along the way.
Understanding Domain Migration: Wix to WordPress Basics
Domain migration means moving your website address from one platform to another. This process differs from content migration. A successful domain transfer maintains your web address while changing the underlying platform. Understanding this distinction helps set realistic expectations.
Moving from Wix to WordPress offers several benefits. WordPress powers over 40% of all websites globally, providing more control and flexibility. You gain access to thousands of plugins and themes. The platform grows with your business needs over time.
Before diving into the technical steps, let’s compare the two platforms to understand what you’re gaining in this transition.
| Feature | Wix | WordPress |
|---|---|---|
| Cost Control | Fixed pricing tiers | Flexible hosting options |
| Customization | Limited to platform options | Virtually unlimited |
| Plugin Ecosystem | Restricted app market | 58,000+ plugins available |
| SEO Control | Basic options | Comprehensive control |
These differences explain why many growing businesses make the switch. Which platform is better for your business needs depends on your specific requirements, but WordPress offers greater long-term value despite a slightly steeper learning curve.
Before You Begin: Essential Preparation Steps
Proper preparation prevents problems. Before initiating any transfer, complete several critical steps. These actions help ensure data preservation and minimize downtime. A methodical approach makes all the difference.
First, verify your domain’s eligibility for transfer. ICANN rules require domains to be registered for at least 60 days before they can be transferred. (Source: WPBeginner). Check your domain registration date if you’re unsure. New domains must wait the full period.
Next, create comprehensive backups of your Wix site. This includes:
- All page content and images
- Blog posts and media
- Contact forms and settings
- Product information (for e-commerce sites)
With backups secure, consider this pre-migration checklist to ensure you’re fully prepared:
| Preparation Task | Importance | Notes |
|---|---|---|
| Verify domain eligibility | Critical | Domain must be registered for 60+ days |
| Back up website content | Critical | Create complete copies of all website assets |
| Research WordPress hosts | High | Compare options based on needs and budget |
| Set up WordPress installation | High | Install on temporary URL first |
| Document current DNS settings | Medium | Take screenshots of existing settings |
Following this checklist ensures you won’t miss critical steps. Thorough preparation makes the actual transfer much smoother.
Choosing the Right WordPress Host
Selecting the right WordPress host affects your site’s performance and security. Many options exist at different price points. Consider several factors before making this important decision.
Managed WordPress hosting provides significant advantages for business websites. Services like WP Engine offer dedicated WordPress support and assist with migrations. (Source: WP Engine). Their specialized knowledge can simplify the entire process. This option costs more but saves considerable time.
Consider separating your domain registrar from your hosting provider. Using services like Namecheap or Cloudflare for domain registration offers more flexibility. (Source: HubSpot). This approach prevents vendor lock-in. It gives you more control over your digital assets.
Budget constraints matter too. Many excellent WordPress hosts offer services at various price points. Balance cost considerations against performance needs. Remember that cheaper isn’t always better for business websites.
Step-by-Step Domain Transfer Process
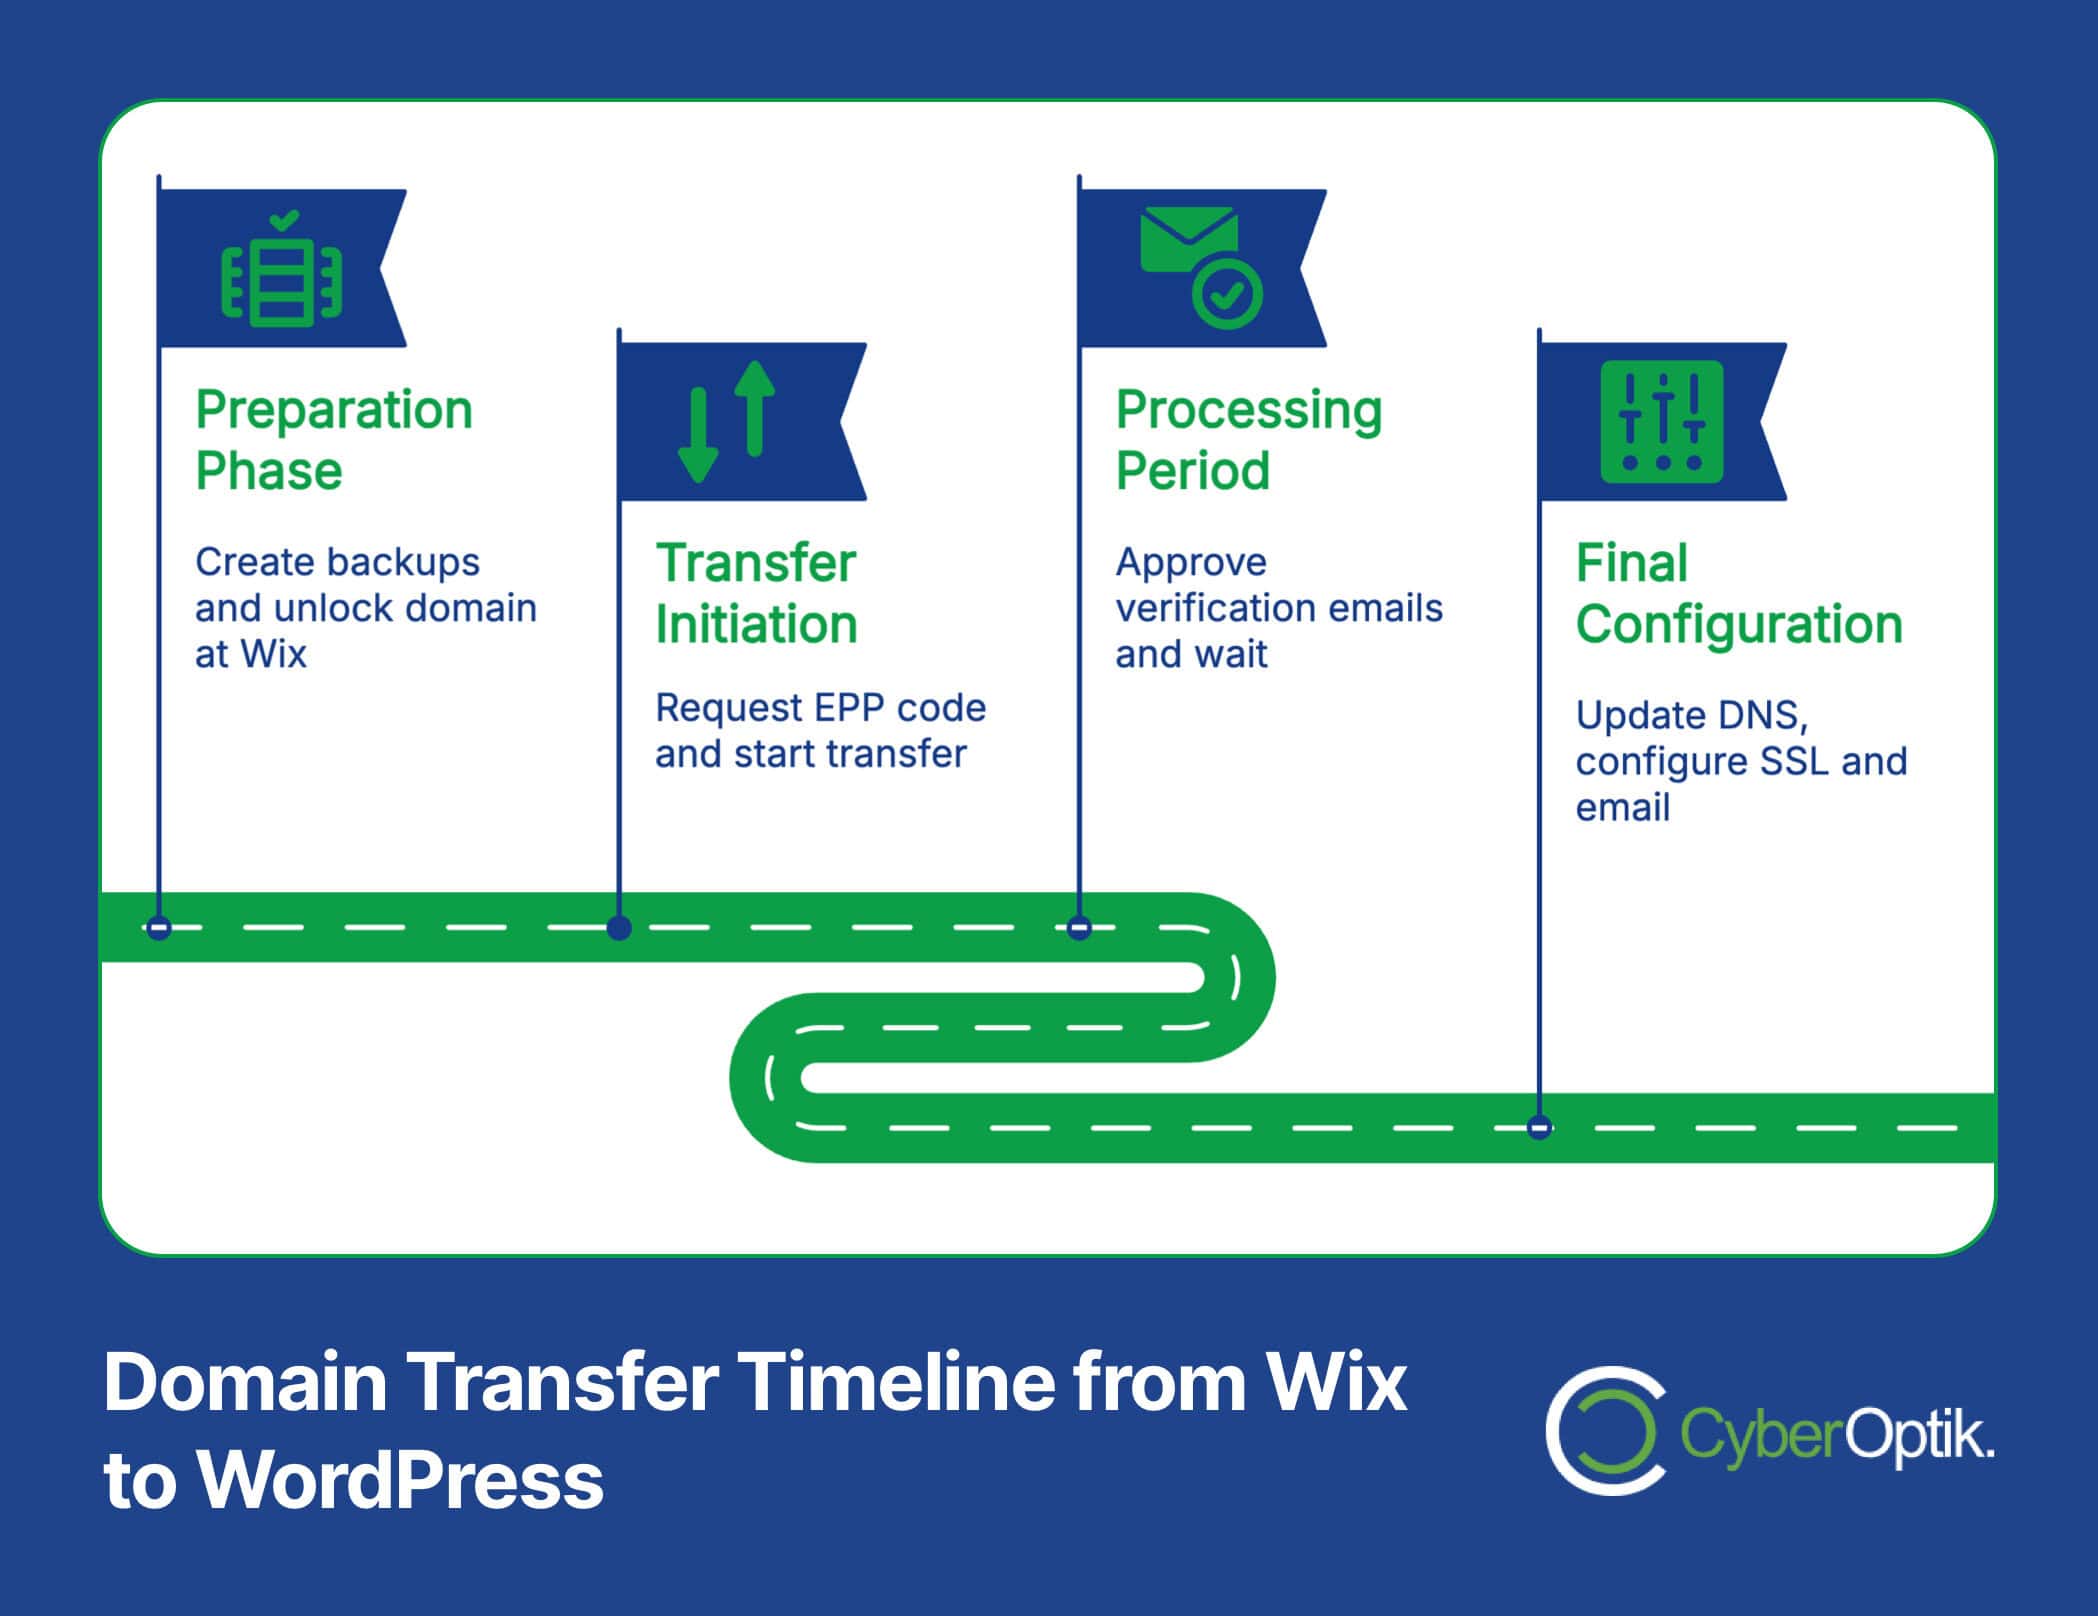
The domain transfer process follows a specific sequence. Understanding each step prevents confusion. The entire process typically takes 5-7 days to complete. Patience remains essential throughout this transition.
Here’s an overview of the timeline you should expect:
| Stage | Typical Duration | Key Activities |
|---|---|---|
| Preparation | 1-2 days | Backups, WordPress installation, domain unlock |
| Transfer Initiation | 1 day | Request EPP code, start transfer at new registrar |
| Waiting Period | 3-5 days | Approval emails, transfer processing |
| DNS Configuration | 1-2 days | Update records, propagation time |
Now let’s examine each step in detail to ensure nothing gets missed during your migration.
Step 1: Unlocking Your Domain at Wix
Domain unlocking is your first technical step. Wix locks domains by default to prevent unauthorized transfers. You’ll need to disable this protection through your Wix Domain Manager. This simple but essential step enables the transfer to proceed.
Start by logging into your Wix account and navigating to the Domain Manager section. Look for the domain you wish to transfer and access its settings. Find the domain lock toggle and switch it to the “Off” position.
After unlocking, you’ll need an Authorization Code (also called EPP code). This code will be sent to the registrant’s admin email address on file. (Source: WPBeginner). Keep this code safe. You’ll need it for the next steps.
Step 2: Preparing Your WordPress Site
While waiting for your transfer to process, prepare your WordPress site. Most hosting companies provide temporary domains during migration. Hostinger, for example, offers 14-day preview domains. (Source: Hostinger). These temporary URLs allow you to build your site before the domain transfer completes.
Here’s what to do during this preparation phase:
- Install WordPress on your temporary domain
- Choose and customize a theme that matches your needs
- Install essential plugins (security, SEO, backup, etc.)
- Import or recreate your content from Wix
- Set up pages, navigation, and basic functionality
This preparation ensures your WordPress site stands ready when your domain arrives. It minimizes downtime during the actual transition.
Step 3: Initiating the Domain Transfer
With your domain unlocked and EPP code in hand, you can initiate the actual transfer. Go to your chosen domain registrar’s website. Look for their transfer domain option. Enter your domain name and follow their specific process.
You’ll need to provide the EPP code when prompted. The registrar will verify this code to authorize the transfer. They’ll also confirm the admin contact email matches the domain registration information.
After submission, watch for confirmation emails. Both registrars will send important messages. Respond promptly to any authorization requests. Delays in responding extend the overall transfer time.
Step 4: Configuring DNS Settings
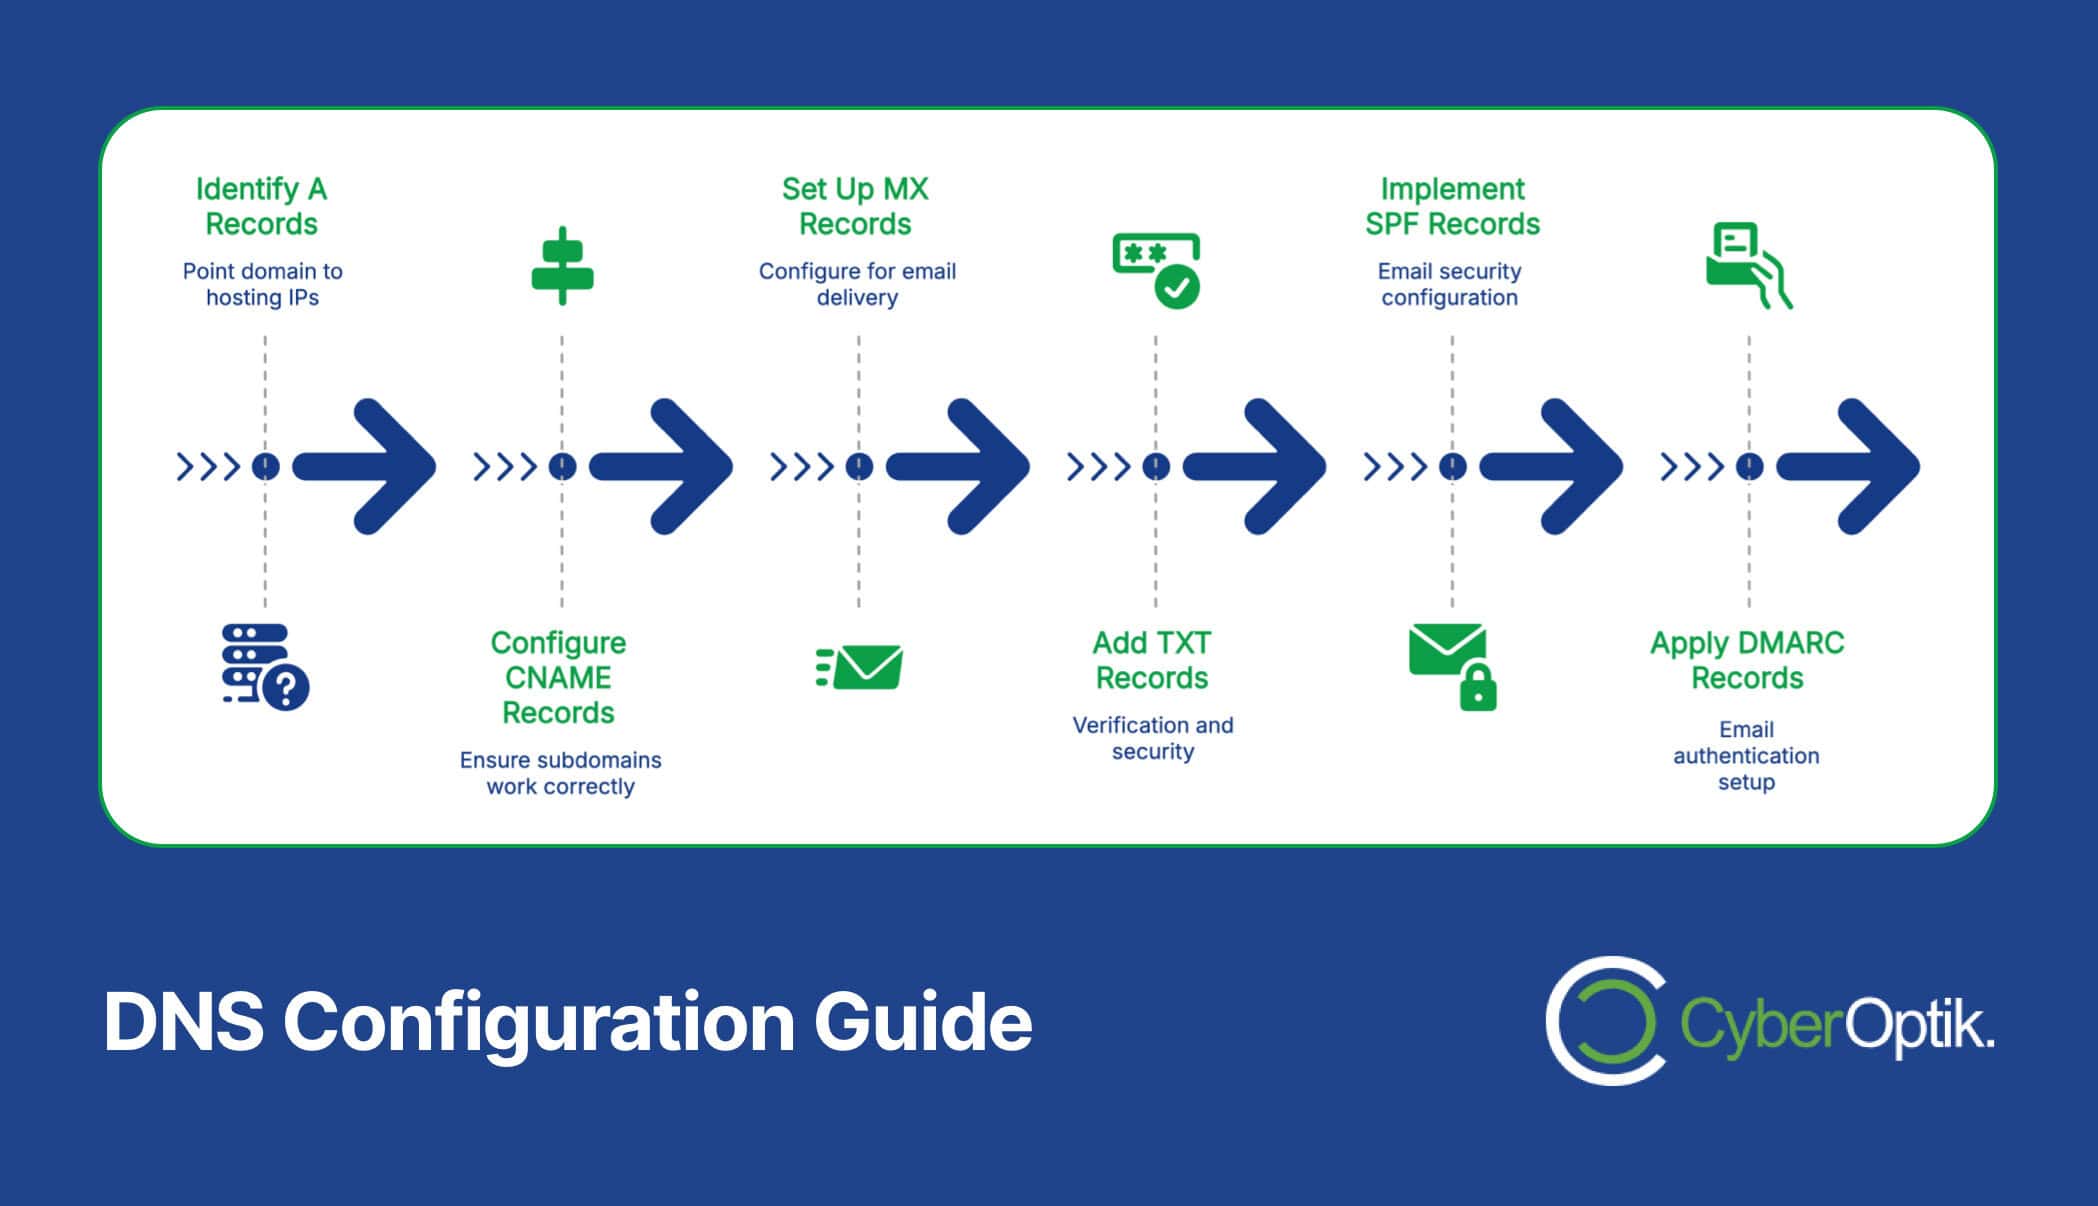
The concept of DNS configuration is crucial for successful migrations. DNS (Domain Name System) records tell browsers where to find your website. Setting these correctly ensures visitors reach your new WordPress site instead of your old Wix one.
WordPress requires specific A record IPs for proper DNS connections: 192.0.78.24 and 192.0.78.25. (Source: Kinsta). These records point your domain to your WordPress hosting server. Your host’s documentation will include their specific recommended settings.
CNAME modification is also essential, especially for the “www” subdomain. This ensures visitors reach your site whether they type your domain with or without “www” at the beginning. Think of this as setting up proper forwarding addresses for your website.
DNS changes aren’t instant. They typically take 24-48 hours to propagate worldwide. During this period, some visitors might see your old site while others see the new one. This inconsistency is normal and temporary.
Post-Transfer Considerations
After your domain transfer completes, several important tasks remain. Addressing these ensures your new WordPress site functions properly. These post-migration activities prevent common problems before they affect your visitors.
Email configuration requires special attention. MX records control email delivery for your domain. These records need reconfiguration after transfer. (Source: Kinsta). Without proper setup, you might miss important messages. Consult your email provider’s documentation for specific settings.
Your SSL certificate needs renewal after DNS changes. Most hosts offer free Let’s Encrypt certificates that automatically install. Verify your site shows the secure padlock icon in browsers. This confirms your SSL certificate works correctly.
Use this post-migration checklist to ensure you’ve covered all bases:
| Post-Transfer Task | Priority | Purpose |
|---|---|---|
| Verify DNS propagation | High | Confirm your domain points to WordPress |
| Check SSL certificate | High | Ensure secure browsing (HTTPS) |
| Configure email (MX records) | High | Maintain email functionality |
| Set up redirects | Medium | Preserve SEO and user experience |
| Test all functionality | Medium | Confirm forms, payments, etc. work properly |
Completing these tasks ensures a smooth transition. It prevents disruption to your business operations during the move.
Setting Up Proper Redirects
Redirects maintain your SEO value and prevent visitor confusion. When you move platforms, your URL structure often changes. Without redirects, visitors clicking old links find error pages. Search engines also penalize sites with broken links.
If you have Wix Premium, you can implement JavaScript redirects. The verified code structure from Wix documentation looks like this:
var hashesarr = {
“#!old-page”:’/new-page/’,
“#!contact”:’/contact-us/’
};
Add this to your WordPress theme’s JS directory to maintain continuity. (Source: HubSpot). This helps preserve your search rankings during the transition. It also ensures visitors find what they’re looking for.
For WordPress, several plugins can help manage redirects. These tools make it easy to map old URLs to new ones. They also provide reports on redirect performance and 404 errors.
Troubleshooting Common Migration Issues
Even with careful planning, issues can arise during migration. Knowing common problems helps you solve them quickly. Most issues have straightforward solutions. Stay calm and methodical when troubleshooting.
DNS propagation delays cause confusion for many site owners. Your domain might work in some locations but not others. This inconsistency is normal during propagation. Wait the full 48 hours before investigating further. The problem often resolves itself.
Missing content issues typically stem from incomplete backups or import problems. Check your Wix export files to ensure everything transferred correctly. For WordPress, verify that your import process completed successfully. Missing media files often require manual uploading.
Email delivery problems usually relate to incorrect MX records. Double-check these settings against your email provider’s recommendations. Contact your host’s support team if emails still don’t work properly. They can often spot configuration errors quickly.
SSL certificate errors appear as security warnings in browsers. Most result from mixed content issues where some resources still load via HTTP instead of HTTPS. Use a plugin like Really Simple SSL to fix these problems automatically. It identifies and corrects mixed content warnings.
Maximizing Your New WordPress Website
After successfully migrating, take advantage of WordPress’s extensive capabilities. The platform offers much more flexibility than Wix. Explore these options to maximize your new site’s potential. Each enhancement improves your visitors’ experience.
We recommend installing these essential WordPress plugins:
- Yoast SEO – Improves search engine visibility
- Wordfence Security – Protects against malware and attacks
- UpdraftPlus – Automates backups to prevent data loss
- WP Rocket – Enhances page loading speed
- Elementor – Provides drag-and-drop page building
Performance optimization becomes simpler with WordPress. Focus on image compression, caching, and code minification. These techniques significantly improve page speed. Faster sites rank better and convert more visitors.
Security best practices include regular updates, strong passwords, and limited login attempts. WordPress security plugins automate many protective measures. Implement two-factor authentication for additional account protection. These steps prevent most common security problems.
Our WordPress migration services can help streamline this process if you’d prefer professional assistance with your transfer. We handle all technical aspects while you focus on your business.

Conclusion
Moving your domain from Wix to WordPress opens new possibilities for your website. The process requires careful planning and execution. Following the steps outlined here ensures a smooth transition. Your patience during migration will pay off with a more capable website.
Remember that domain transfers take time. The technical steps might seem challenging, but breaking them into manageable tasks makes the process easier. Most businesses complete the entire migration within a week. The flexibility and control gained make the effort worthwhile.
As always, we’re here to help if you need professional assistance with your website migration. Our team specializes in smooth transitions from Wix to WordPress. We handle the technical details while you focus on your business. Contact us today to discuss your specific migration needs.