Domain transfers often cause unnecessary stress. Many business owners find themselves confused by technical terminology and complex processes when moving from WordPress to Squarespace. We’ve guided numerous clients through this transition and created this comprehensive walkthrough to make your domain transfer smooth and worry-free.
Whether you’re rebranding, consolidating services, or simply prefer Squarespace’s interface, this guide covers everything you need to know. We’ll break down each step of the domain transfer process, explain the technical requirements, and help you avoid common pitfalls.
Let’s start with the essentials.
Domain Transfer Requirements
Before starting the domain transfer process, you need to verify a few requirements. Squarespace has specific eligibility criteria for domain transfers. Your domain must be at least 60 days old at your current registrar. (Source: Squarespace)
Not all domain extensions can be transferred to Squarespace. Certain TLDs including .au, .jp, .nz, and registry premium domains are excluded from Squarespace’s transfer service. Check compatibility before proceeding with your transfer plans.
The following table outlines what you’ll need before beginning the transfer process:
| Requirement | Description | Why It's Needed |
|---|---|---|
| Domain Age | At least 60 days since registration or last transfer | ICANN rule to prevent domain theft |
| WordPress Admin Access | Administrator access to your WordPress dashboard | Required to unlock domain and obtain codes |
| Squarespace Account | Active Squarespace site ready to receive domain | Destination for your transferred domain |
| Email Access | Access to domain contact email address | Required for verification emails |
Having these elements ready will streamline your transfer process. Take time to verify each requirement before proceeding to avoid delays or complications.
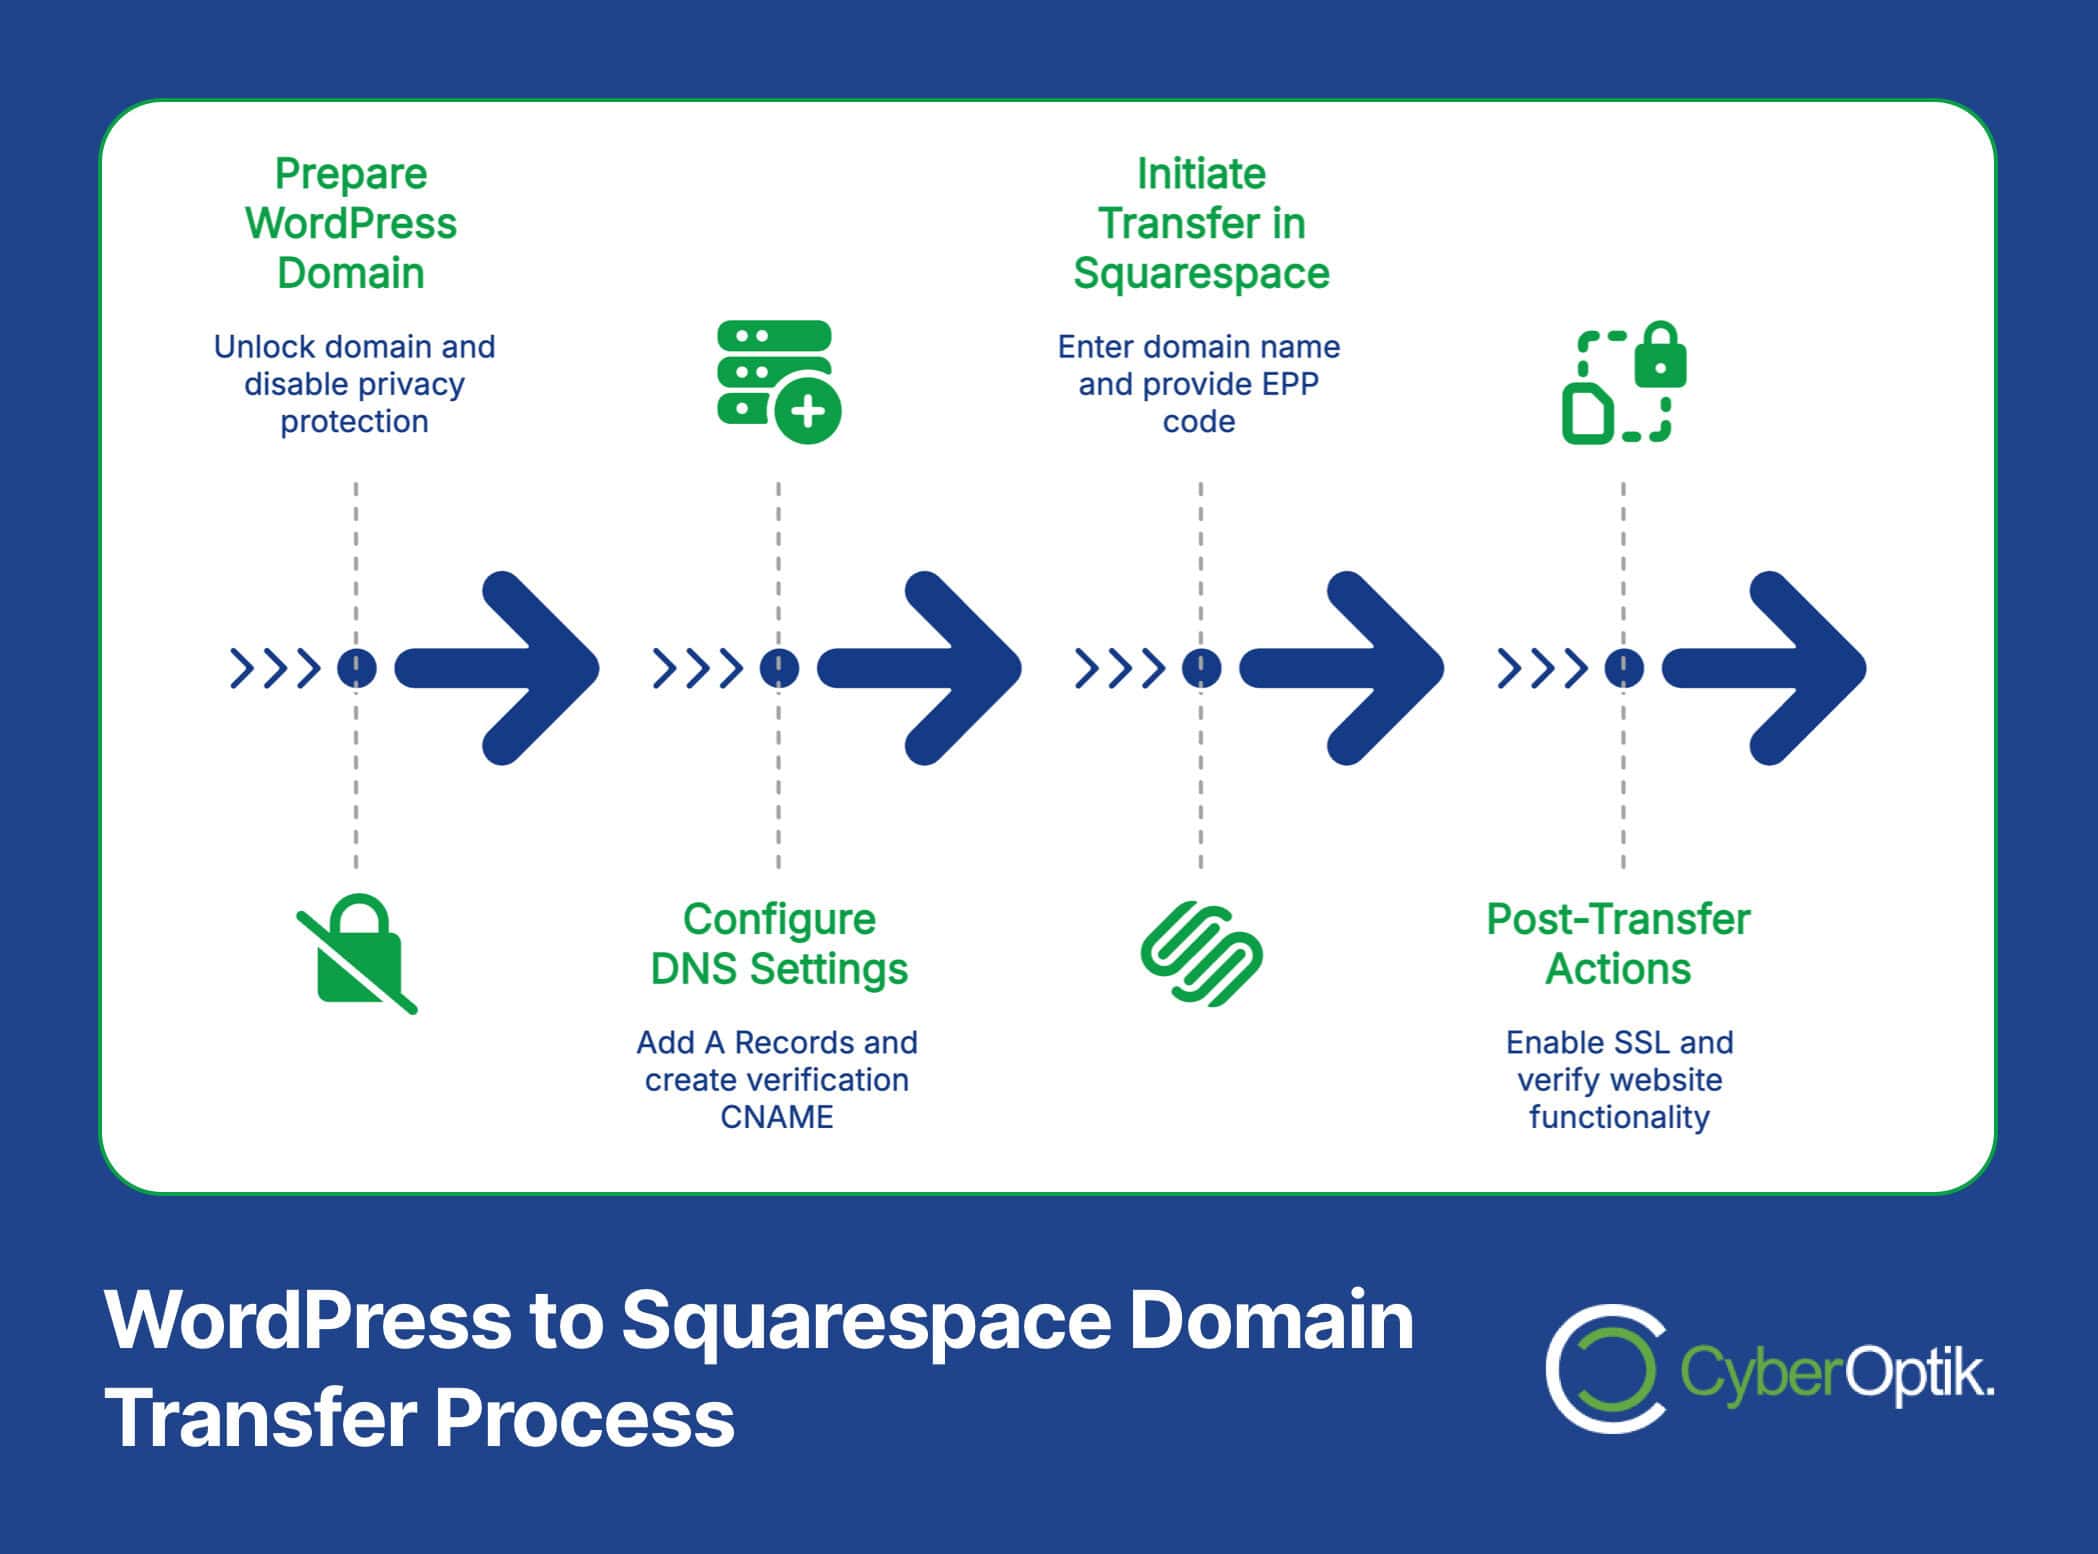
Preparing Your WordPress Domain
Proper preparation prevents problems. The first stage of transferring your domain requires several key actions within your WordPress account. These steps ensure your domain is ready to be released from WordPress and accepted by Squarespace.
Unlocking Your Domain
Domain locks exist to prevent unauthorized transfers. You must disable this protection before initiating a transfer. To unlock your domain in WordPress, navigate to your Domains section within your WordPress.com dashboard, select the domain you wish to transfer, and look for the domain lock setting. (Source: WordPress)
The unlocking process typically takes a few minutes to complete. Some registrars might have a waiting period after unlocking before allowing transfers to proceed, so plan accordingly.
Disabling Domain Privacy Protection
Privacy protection shields your personal information in WHOIS records. While valuable for everyday use, this feature often blocks transfer verification emails. Temporarily disable privacy protection during the transfer process to ensure you receive all required verification messages.
You can typically find this setting near the domain lock options in your WordPress domain management area. Remember to re-enable privacy after completing the transfer if Squarespace offers this feature.
Obtaining the EPP Authorization Code
The EPP (Extensible Provisioning Protocol) authorization code functions like a password for your domain. This unique code proves you have the authority to transfer the domain. Request this code from WordPress through your domain management dashboard. (Source: GS Plugins)
WordPress will either display the code immediately or send it to your registered email address. Keep this code secure, as anyone with this code can potentially initiate a domain transfer. You’ll need to enter it during the Squarespace transfer process.
Configuring DNS Settings
DNS (Domain Name System) settings direct traffic to your website. Think of DNS as the internet’s address book. Before completing the transfer, you need to configure these settings to point toward Squarespace’s servers. This step ensures a smooth transition with minimal downtime.
Understanding how DNS works is crucial for a smooth domain transfer process. Let’s cover the essential DNS records you’ll need to add.
Adding A Records to Point to Squarespace
A Records connect your domain name to specific IP addresses. You’ll need to add four specific A Records pointing to Squarespace’s servers. The process involves accessing your domain’s DNS management panel in WordPress and creating these records manually. (Source: Squarespace)
| Record Type | Host | Points To (Value) | TTL |
|---|---|---|---|
| A | @ | 198.185.159.144 | 3600 or auto |
| A | @ | 198.185.159.145 | 3600 or auto |
| A | @ | 198.49.23.144 | 3600 or auto |
| A | @ | 198.49.23.145 | 3600 or auto |
These specific IP addresses route visitors to Squarespace’s servers when they type your domain name. The @ symbol represents your root domain without any subdomains. TTL (Time To Live) determines how long these settings are cached.
Creating the Verification CNAME Record
CNAME records create aliases pointing one domain to another. For Squarespace domain transfers, you need to add a verification CNAME record. This record validates your ownership of the domain during the transfer process.
Squarespace provides a unique verification code for each transfer request. You’ll create a CNAME record with this unique code as the Host, pointing to “verify.squarespace.com” as the value. This verification process follows standard domain security protocols.
Initiating the Transfer in Squarespace
After preparing your domain and configuring DNS, you’re ready to initiate the transfer process in Squarespace. This step moves the domain registration from WordPress to Squarespace. The process is straightforward but requires attention to detail.
Start by logging into your Squarespace account and navigating to the Settings menu. Look for Domains, then “Transfer a domain.” Enter your domain name and follow the prompts.
When asked about payment, know that Squarespace doesn’t charge a separate transfer fee; instead, the payment covers a one-year extension to your domain registration. (Source: WordPress)
At this point, you’ll need to provide your EPP authorization code from WordPress. Enter it exactly as it appears, as these codes are case-sensitive. After submitting the code, Squarespace initiates the verification process.
Verifying Domain Ownership
Domain ownership verification protects against unauthorized transfers. Squarespace employs standard verification procedures to confirm you control the domain. The process typically involves email verification and checking the previously added CNAME record.
You’ll receive an email at the address listed in your domain’s WHOIS information. This message contains a verification link or code. Click the link or enter the code in your Squarespace dashboard to confirm ownership. If you don’t receive this email, check your spam folder or verify your WHOIS information is correct.
Wondering how to add other users to manage your Squarespace domain? We cover that in a separate guide.
Waiting for Transfer Completion
Domain transfers aren’t instantaneous. After verification, the transfer enters a processing period. This waiting phase typically takes around 15 days to complete, though some transfers finish sooner. (Source: Elfsight)
During this period, your website remains accessible. The DNS changes you made earlier ensure visitors can access your Squarespace site even while the domain registration transfer is still processing. This approach minimizes downtime during the transition.
You can check the status of your transfer in your Squarespace dashboard under Domains. Squarespace provides updates as the transfer progresses through various stages. Be patient during this time, as repeatedly canceling and restarting transfers can cause further delays.
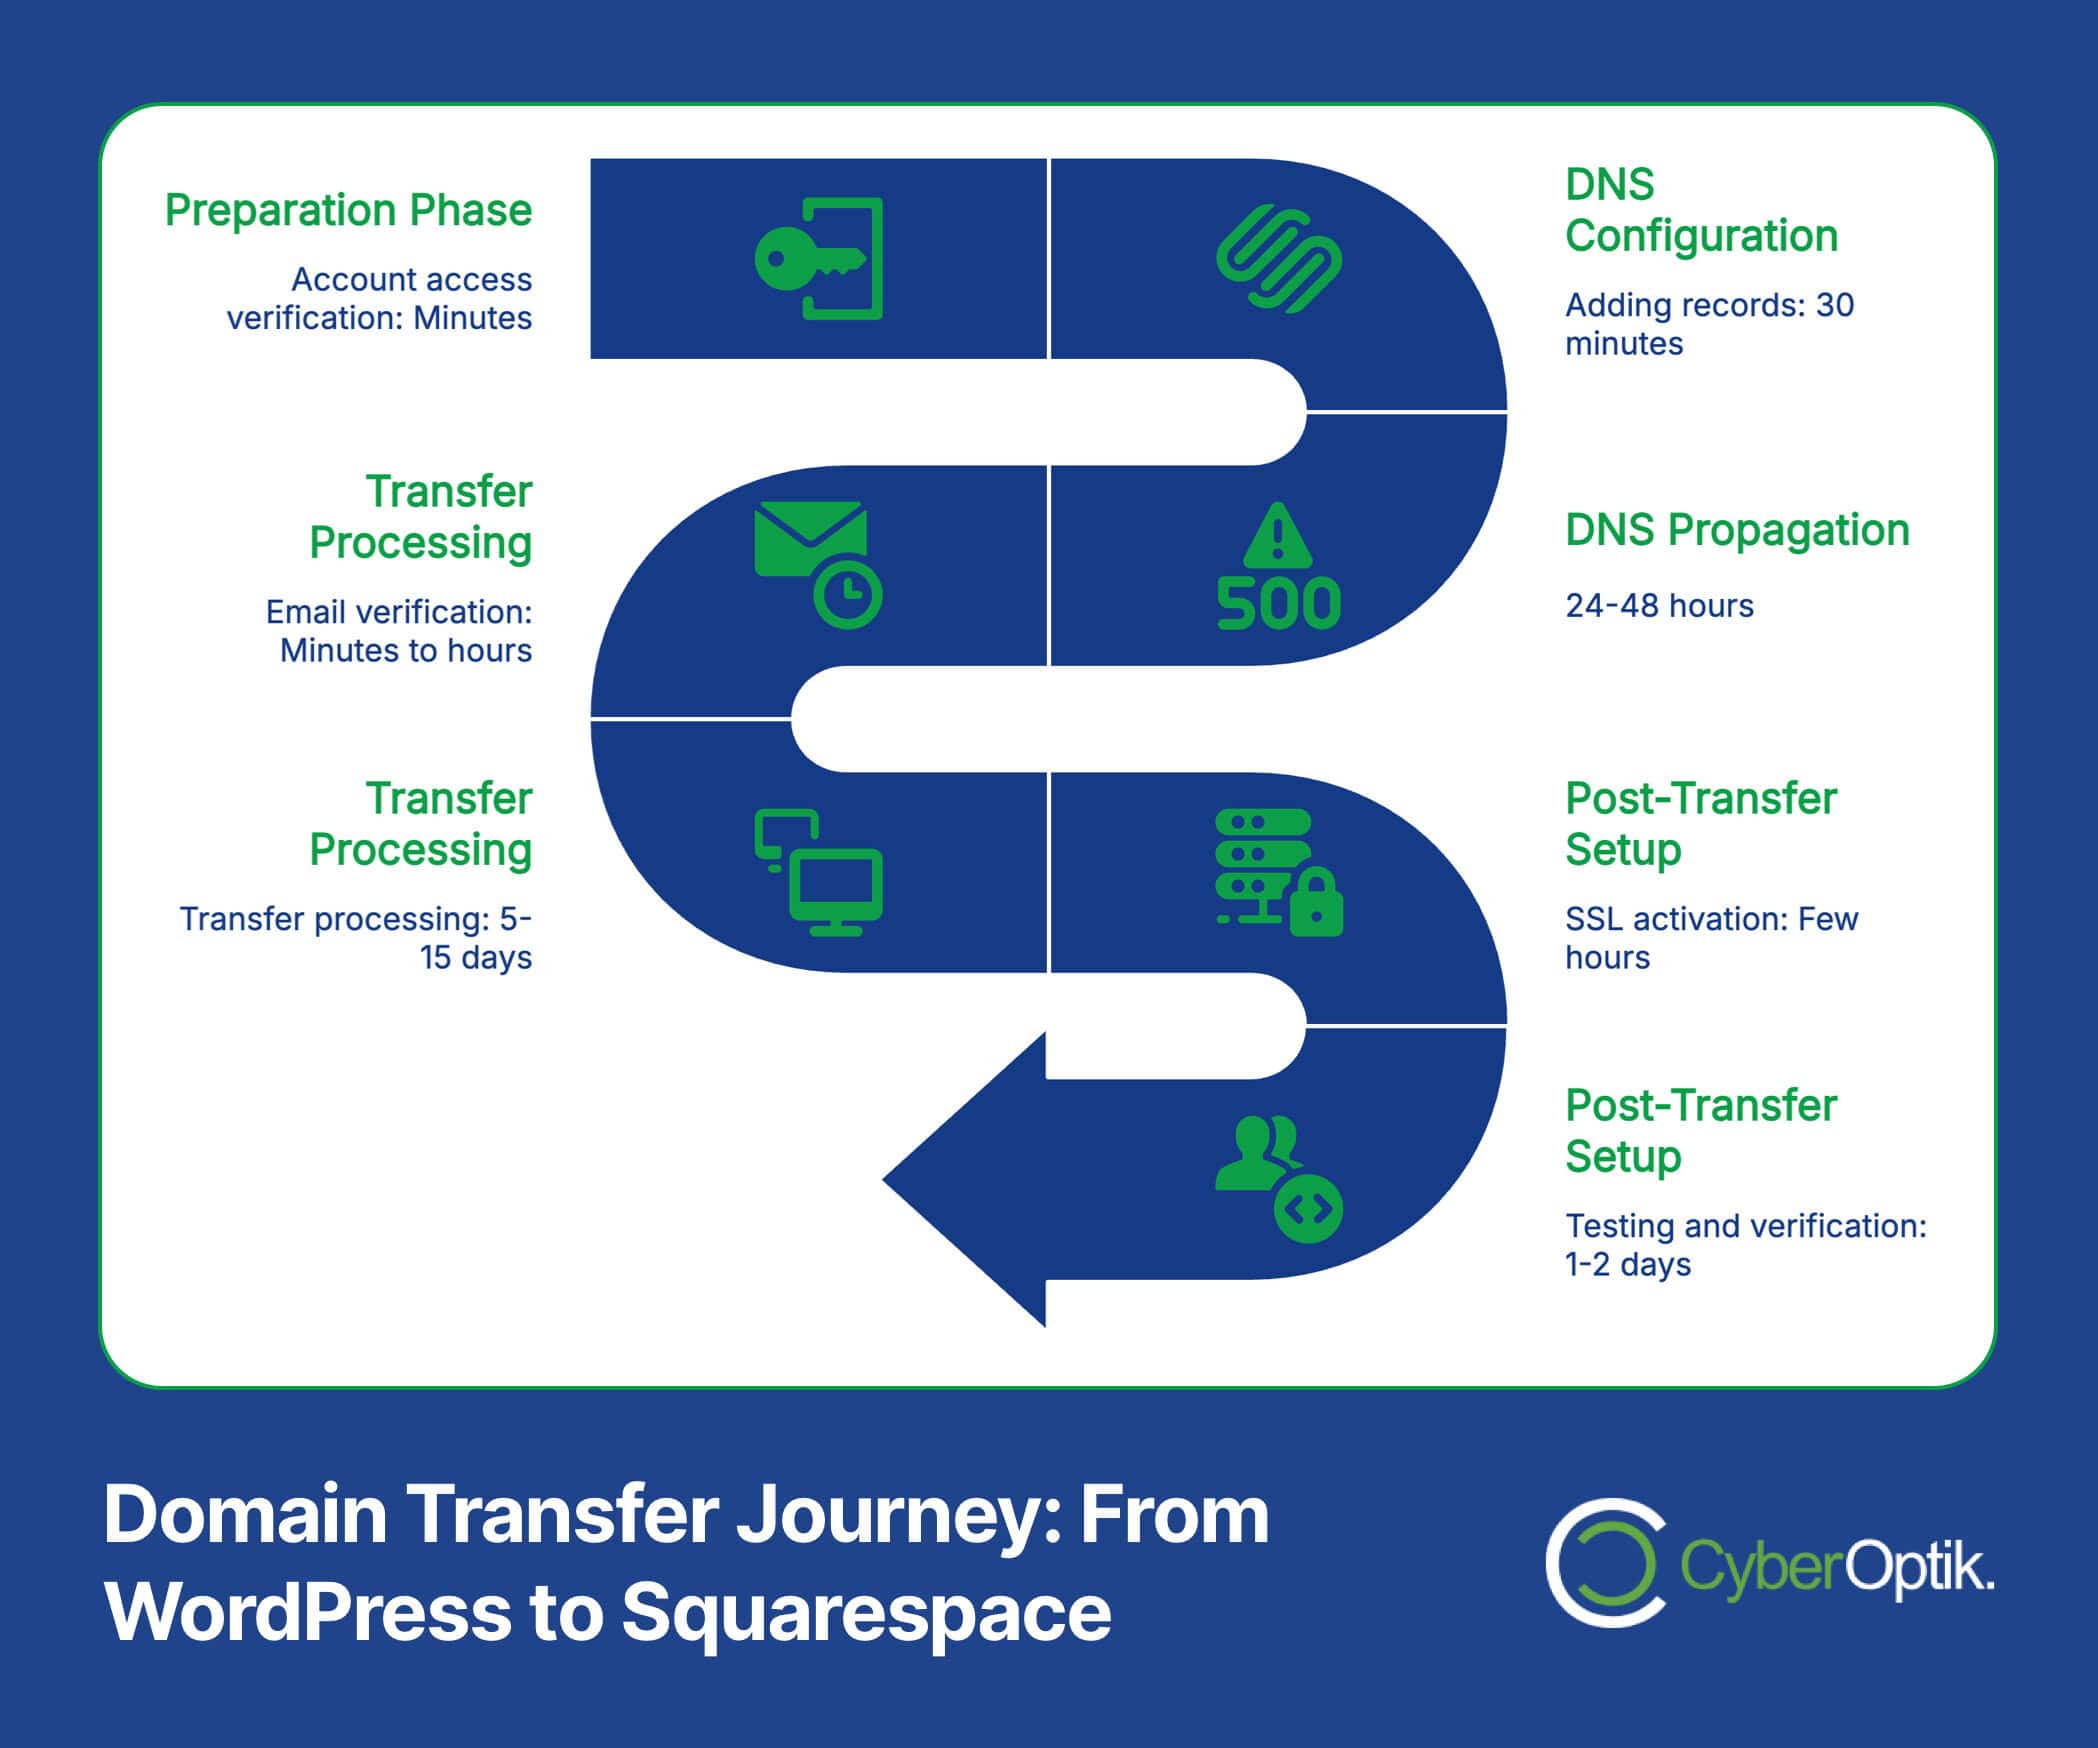
The comparison table below shows typical timeframes for different aspects of the domain transfer process:
| Process | Typical Timeframe | Factors Affecting Duration |
|---|---|---|
| DNS Propagation | 24-48 hours | ISP caching, TTL settings |
| Email Verification | Minutes to hours | Email delivery, spam filtering |
| Domain Transfer Processing | 5-15 days | Registrar policies, ICANN rules |
| Complete Migration | 2-3 weeks | Content complexity, response times |
These timeframes provide general expectations. Your specific transfer might move faster or slower depending on various factors. Most importantly, your website visitors should experience minimal disruption during this period.
Post-Transfer Actions
Once the transfer completes, several important actions ensure your domain functions optimally with Squarespace. These steps finalize the transfer process and secure your website.
Enabling SSL Certificate
SSL certificates provide secure connections for your visitors. After completing the transfer, enable SSL in your Squarespace settings. Navigate to Settings > Security & SSL and follow the prompts to enable SSL for your domain. (Source: Squarespace)
The SSL activation process typically takes a few hours to complete. During this time, visitors might see security warnings when accessing your site. These warnings disappear once the SSL certificate is fully activated.
Verifying Email MX Records
MX records direct email for your domain. Most MX records transfer automatically during the domain transfer process. However, you should verify these settings to ensure uninterrupted email service.
If you use a third-party email provider like Google Workspace or Microsoft 365, check that your MX records are still correctly configured in Squarespace. If you notice email disruptions, you may need to manually recreate these records.
Testing Website Functionality
Thorough testing prevents potential issues. After the transfer completes, test all aspects of your website functionality. Verify that:
- All pages load correctly
- Forms submit properly
- E-commerce functions work (if applicable)
- Site loads securely (https protocol)
- Mobile responsiveness is maintained
Address any issues immediately. Most post-transfer problems relate to DNS configuration or content migration rather than the domain transfer itself.
Migrating Your WordPress Content
Domain transfer and content migration are separate processes. While your domain transfer focuses on where your website “lives,” content migration moves the actual website materials—text, images, pages, and posts.
Squarespace provides a WordPress import tool that simplifies content migration. Use the WordPress export feature to create an XML file of your content, then import this file into Squarespace. This process transfers basic content like pages and blog posts. (Source: Collaborada)
Setting Up 301 Redirects
Redirects maintain your SEO value. If your URL structure changes during migration, implement 301 redirects to preserve search engine rankings and prevent broken links. Squarespace allows you to set up these redirects in Settings > Advanced > URL Mappings.
Many businesses find that WordPress remains the optimal platform even after exploring alternatives. If you’re transferring to Squarespace but encountering limitations, consider your options carefully.
For complex WordPress sites with custom functionality, be aware that not everything migrates automatically. Custom post types, plugins, and specialized features often require manual recreation in Squarespace. Plan accordingly and prioritize essential elements.
Troubleshooting Common Domain Transfer Issues
Even with careful planning, issues can arise. Understanding common problems helps you address them quickly. Let’s examine frequent domain transfer challenges and their solutions.
| Common Issue | Potential Cause | Solution |
|---|---|---|
| Transfer Rejection | Domain lock still active, privacy protection enabled | Verify domain is unlocked, privacy protection disabled |
| Verification Failure | Incorrect CNAME record, missing email verification | Double-check DNS settings, check spam folder for emails |
| Website Downtime | DNS propagation, incorrect A records | Verify A records, wait for DNS propagation (24-48 hours) |
| Missing Content | Import limitations, template differences | Manually recreate essential elements, adjust design |
If you’re experiencing issues with the transfer process, don’t panic. Most problems have straightforward solutions. (Source: Big Cat Creative)
If you’ve attempted troubleshooting without success, reach out to Squarespace support or consider consulting with a web design professional. Sometimes, technical complexities require expert intervention.
If you’re considering a complete CMS migration, there are additional steps to consider beyond just the domain transfer process.

Conclusion
Transferring a domain from WordPress to Squarespace involves several technical steps but follows a logical process. By preparing properly, configuring DNS correctly, and following verification procedures, you can complete the transfer with minimal disruption to your website.
Remember that domain transfers typically take up to 15 days to complete. During this time, proper DNS configuration ensures your website remains accessible to visitors. After the transfer completes, enable SSL and verify email functionality to finalize the process.
Content migration may require additional attention, especially for complex WordPress sites with custom features. Plan this aspect carefully and implement 301 redirects to preserve your SEO value.
Need professional assistance with your domain transfer or website migration? Our team specializes in these technical transitions. Contact us today to ensure a smooth, worry-free move to your new platform.