Domain migration can be intimidating. Many business owners worry about losing website traffic or experiencing downtime during the transition. We regularly help clients connect their Wix domains to WordPress websites without these common issues. This comprehensive guide will walk you through the entire process step by step.
Whether you’re looking for more flexibility with your website or need advanced features not available on Wix, connecting your domain to WordPress offers numerous benefits. The key to success lies in proper preparation and following a methodical approach.
In this guide, we’ll cover everything you need to know about connecting your Wix domain to WordPress. You’ll learn how to prevent downtime, maintain your SEO rankings, and ensure a smooth transition for your website visitors.
Understanding Domain Connection vs. Domain Transfer
Before starting the process, you should understand the difference between domain connection and domain transfer. These two approaches serve different purposes and involve distinct processes.
Domain connection means pointing your Wix domain to your WordPress website while keeping the domain registered with Wix. You’ll only change the DNS settings. Your domain renewal and management will still happen through Wix.
Domain transfer involves moving your domain registration completely from Wix to another registrar. This process changes the ownership records and requires more steps. You’ll manage renewals through the new registrar afterward.
| Feature | Domain Connection | Domain Transfer |
|---|---|---|
| Domain registration location | Remains at Wix | Moves to new registrar |
| DNS management | Modified at Wix | Managed at new registrar |
| Implementation time | Faster (hours) | Longer (days to weeks) |
| Renewal management | Through Wix | Through new registrar |
| Best for | Quick transitions | Long-term management |
Most users opt for domain connection when they need to quickly transition their website without waiting for a full transfer process. However, domain transfers offer more control over your domain in the long run.
Domain Connection: What It Means
Domain connection is simpler than transfer. It involves changing where your domain points to without changing where it’s registered. Think of it like changing the address your mail forwards to without changing your legal address.
When you connect your domain, you modify its DNS (Domain Name System) settings. These settings tell internet browsers where to find your website when someone types your domain name. You’ll point these settings to your WordPress hosting server.
The main benefit of connection is speed. DNS changes typically propagate within hours, though full propagation can take longer. You’ll keep your existing domain registration terms and renewal dates.
Domain Transfer: A Different Approach
Domain transfer is more complex. It moves your domain registration from Wix to another registrar like Namecheap, GoDaddy, or directly to your WordPress host. This process changes who manages your domain.
Transferring requires an authorization code (EPP code) from Wix and several verification steps. The domain must be unlocked for transfer and meet certain eligibility requirements. Domain transfers require an EPP code from Wix and typically extend your registration by one year. (Source: WP SitePlan)
Complete transfers offer consolidated management. You’ll handle your domain and website in one place, which can simplify billing and technical support. However, transfers take longer to complete than simple connections.
Which Option Is Right for Your Website
Choose domain connection if you need a quick solution. It works well when you want to keep your existing domain registration or need to move quickly. Many clients prefer this option when first transitioning from Wix.
Choose domain transfer if you want complete control. This option makes sense if you’re fully committed to WordPress and want to consolidate your digital assets. It’s also helpful if you’re unhappy with Wix’s domain pricing or management tools.
For this guide, we’ll focus on domain connection. This approach provides the quickest path to getting your WordPress site live with your current domain while minimizing downtime.
Preparing for Domain Connection
Proper preparation prevents problems. Before changing any DNS settings, complete these essential steps to ensure a smooth domain connection process.
Backing Up Your Wix Website Content
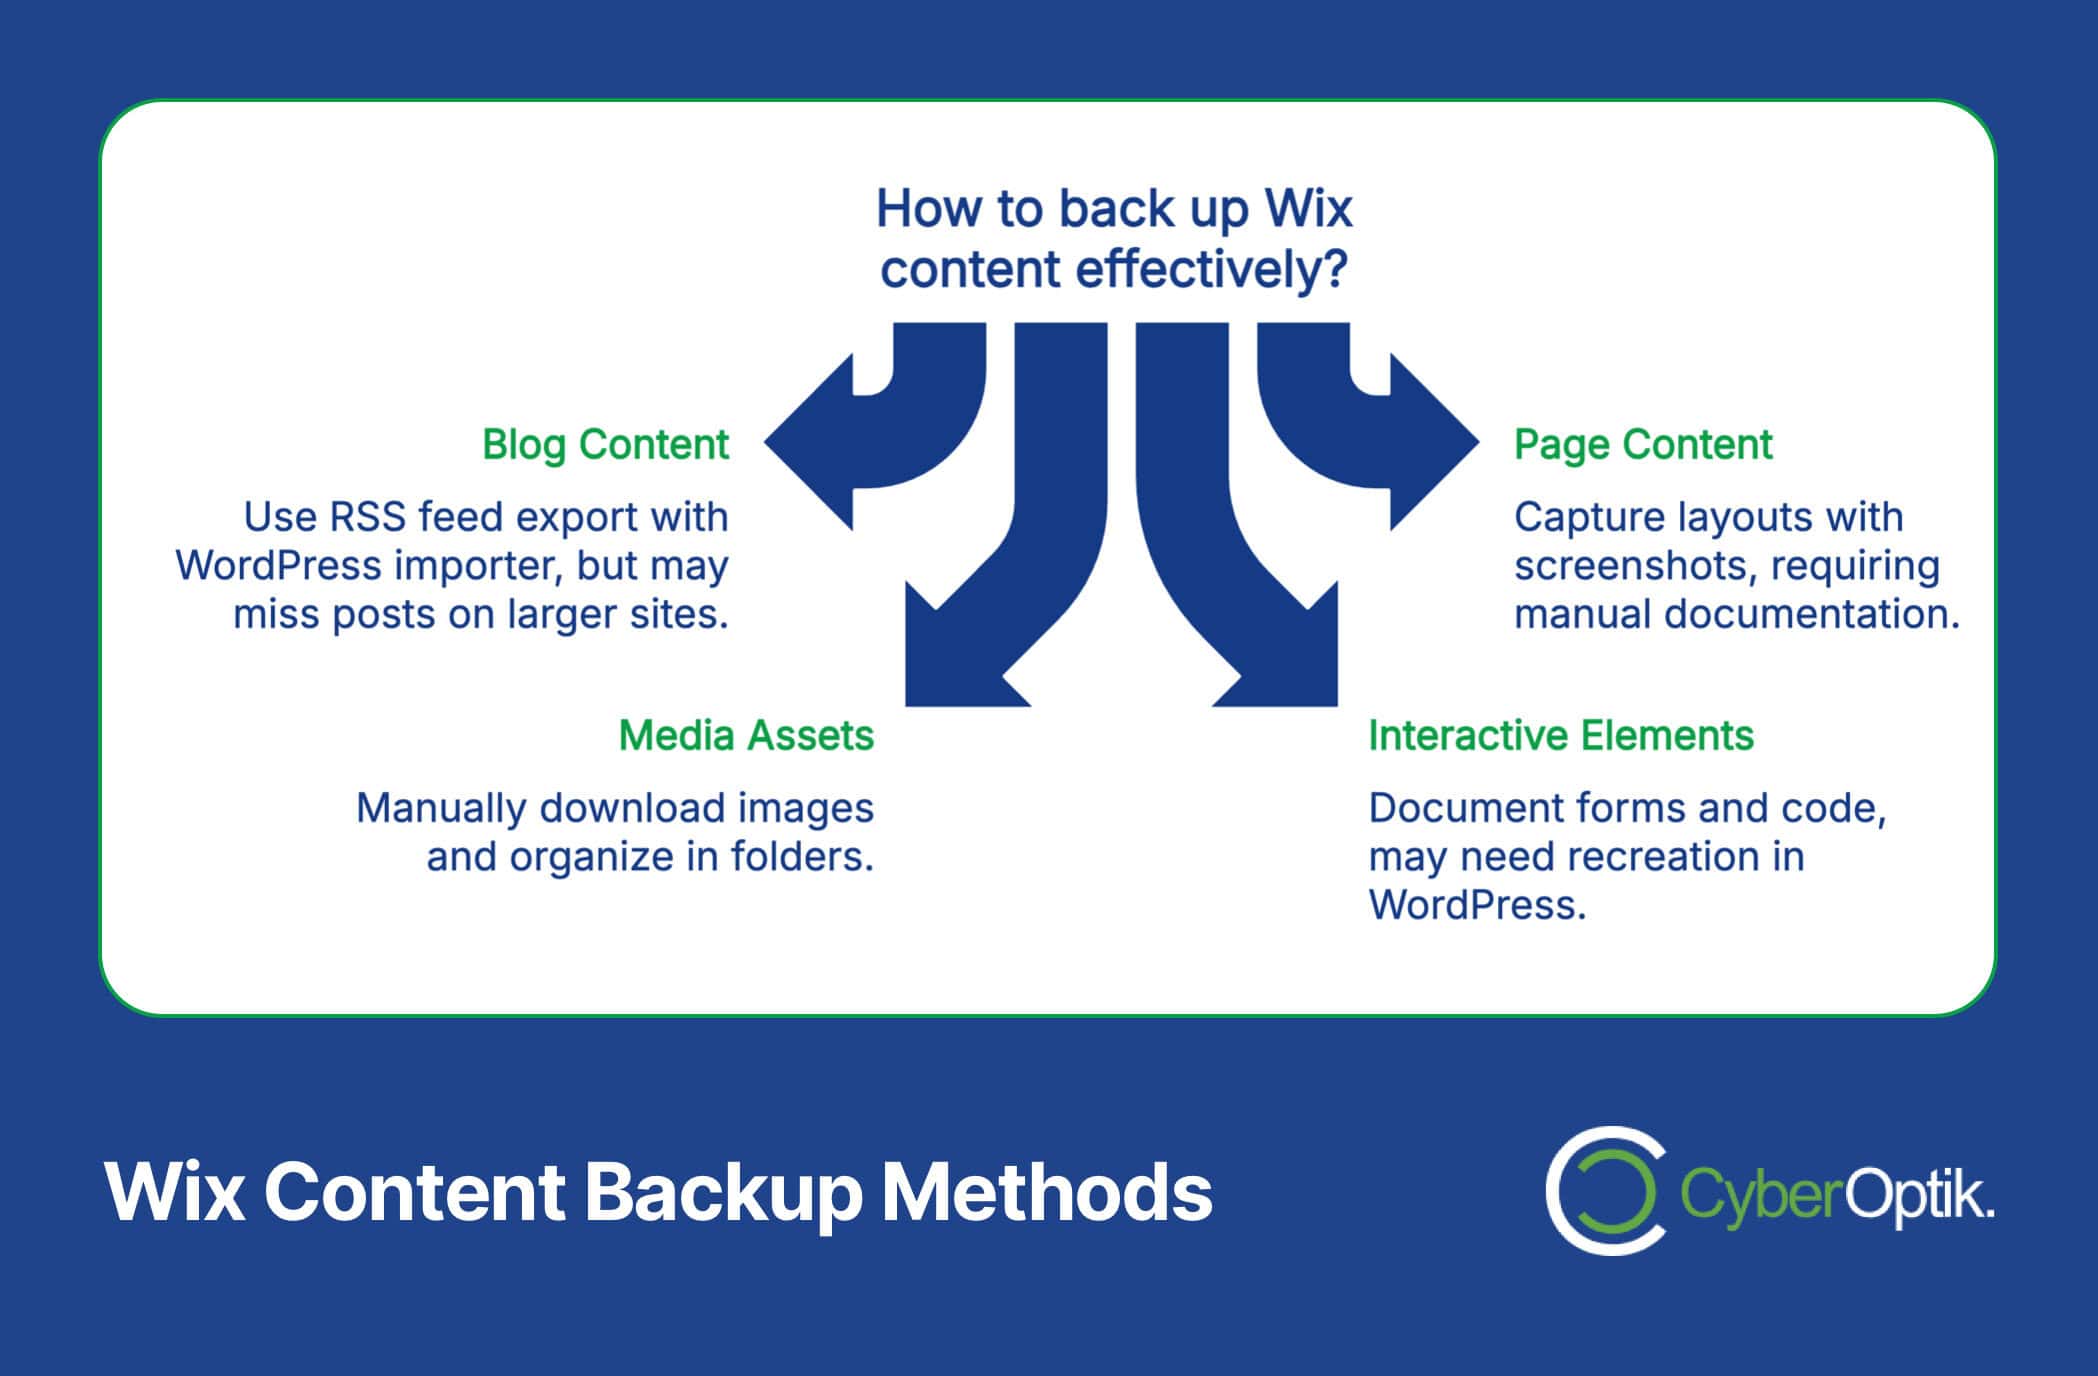
Start by backing up your Wix website content. Unfortunately, Wix doesn’t offer a complete export function like other platforms. You’ll need to save your content manually or use specialized tools.
For blog posts, Wix allows limited export via RSS feeds. However, these feeds may fail to import all posts for larger websites with substantial content volumes. (Source: WPBeginner)
For other content, take screenshots of your pages. Save text content in documents and download images separately. This approach ensures you have references when rebuilding your site in WordPress.
| Content Type | Backup Method | Tools Required |
|---|---|---|
| Blog posts | RSS feed export | WordPress importer |
| Page layouts | Screenshots | Screenshot tool |
| Images | Manual download | None |
| Forms | Documentation | Text editor |
| Custom code | Copy/paste | Text editor |
Professional migration services can help with more complex websites. These services use advanced tools to transfer content more completely than manual methods allow.
Setting Up Your WordPress Website
Set up your WordPress website completely before connecting your domain. This preparation ensures visitors see a finished site immediately after the domain connection goes live.
Your WordPress setup should include:
- Installing and configuring your chosen theme
- Setting up essential plugins
- Creating your main pages and navigation
- Importing or recreating your content
- Setting up forms and other functionality
WordPress offers significantly more flexibility and SEO options than Wix. Take advantage of these benefits by properly optimizing your site structure and content before going live. WordPress provides superior SEO flexibility compared to Wix’s more limited options. (Source: WP Engine)
Most importantly, make your WordPress site accessible via its temporary URL. This accessibility allows you to test everything thoroughly before connecting your domain.
Creating a Connection Plan to Prevent Downtime
Create a detailed connection plan before making any changes. This planning should include a timeline, specific DNS settings, and fallback options if problems occur.
Using temporary domains for development and testing prevents downtime during the migration process. This approach allows you to build and perfect your WordPress site without affecting your live Wix site. (Source: The White Label Agency)
Your connection plan should answer several key questions:
- When exactly will you change DNS settings?
- What specific DNS records will you modify?
- Who needs to be notified about potential temporary disruptions?
- How will you handle email if your domain includes email services?
- What is your fallback plan if issues arise?
Include a specific timeline in your plan. Choose a low-traffic period for making the actual DNS changes, such as evenings or weekends for business websites.
Step-by-Step: Connecting Your Wix Domain to WordPress
Now that you’ve prepared properly, let’s proceed with the actual connection process. We’ll cover the two main methods: using name servers and using A records.
Method 1: Using Name Servers (DNS)
Using name servers is the simplest approach. This method completely delegates DNS management to your WordPress host. It works well when your WordPress hosting provider offers DNS management.
To connect using name servers:
- Log into your Wix account
- Go to the Domains section
- Select your domain name
- Look for “Nameservers” or “DNS settings”
- Select “Use custom nameservers”
- Enter your WordPress host’s nameservers
- Save your changes
Your WordPress host will provide their specific nameserver addresses. These typically look like ns1.hostingcompany.com, ns2.hostingcompany.com, etc. You’ll need to enter all nameservers provided by your host.
Important Note
If you use email services through your Wix domain, changing nameservers may disrupt your email. Consider setting up MX records on your WordPress host before changing nameservers to maintain email continuity.
Method 2: Using A Records
The A record method provides more control. It allows you to point only your website to WordPress while keeping other services (like email) at Wix. This approach requires more technical knowledge but offers greater flexibility.
To connect using A records:
- Log into your Wix account
- Go to the Domains section
- Select your domain name
- Choose “Advanced” or “DNS Records”
- Look for records with Type “A” for your root domain
- Change these to point to your WordPress hosting IP address
- Add or modify the CNAME record for “www” to point to your domain or host
- Save your changes
You’ll need your WordPress hosting IP address for this method. Your hosting provider will supply this information, usually in their documentation or control panel.
| Record Type | Name/Host | Value/Points To | TTL |
|---|---|---|---|
| A | @ (root domain) | [Your WordPress Host IP] | 600 seconds (or as recommended) |
| CNAME | www | @ or your domain | 600 seconds (or as recommended) |
| CNAME | * (wildcard) | @ or your domain | 600 seconds (or as recommended) |
Custom JavaScript redirects can be implemented via Wix’s Custom Code section to handle specific page redirects while DNS changes propagate. This approach helps preserve traffic to key pages during the transition period. (Source: Seahawk Media)
Special Considerations for Wix Domain Types
Different Wix domain types require slightly different approaches. Premium domains (those you purchased) offer full connection capabilities, while free Wix subdomains have limitations.
For premium Wix domains (like yourbusiness.com):
- You have full control to change nameservers or DNS records
- You can connect to any WordPress host
- All methods described above will work
For free Wix subdomains (like yourbusiness.wixsite.com):
- You cannot connect these to external WordPress sites
- You must purchase a domain to use with WordPress
- Free Wix subdomains cannot implement redirects to external sites
If you’re using a free Wix subdomain, your best option is to purchase a new domain. You can either buy one through your WordPress host or through a separate domain registrar.
Preventing Traffic Loss During the Transition
Traffic loss commonly occurs during domain migrations. With proper planning, you can minimize or even eliminate this problem. Let’s explore the best practices for preserving your traffic.
Using Temporary URLs for Testing
Smart migration strategies use temporary URLs during development. Your WordPress host provides these temporary addresses automatically when you set up hosting.
Temporary URLs allow you to:
- Build your complete WordPress site without affecting your live Wix site
- Test all functionality thoroughly before connecting your domain
- Make adjustments based on testing without disrupting visitors
- Have a fallback if domain connection issues occur
Keep your Wix site running until your WordPress site is fully tested and ready. This approach ensures continuous service for your visitors during the development phase.
Implementing Proper Redirects
Redirects are crucial for preserving traffic and SEO value. They tell search engines and visitors where to find your content at its new location. Implementing them correctly prevents 404 errors and lost visitors.
For the best results, create a comprehensive redirect strategy:
| Redirect Type | When to Use | Implementation Method |
|---|---|---|
| 301 (Permanent) | For most page migrations | WordPress redirect plugin or .htaccess |
| 302 (Temporary) | For temporary changes | WordPress redirect plugin or .htaccess |
| Domain-level | For full domain changes | DNS settings |
| Page-specific | For URL structure changes | Redirect plugin mapping |
Create a redirect map that pairs each Wix page URL with its corresponding WordPress URL. Use a spreadsheet to track all pages requiring redirects. Focus especially on high-traffic pages and those with external backlinks.
WordPress plugins like Redirection or 301 Redirects make implementing redirects easy after your domain connects. These tools allow you to manage redirects through a simple interface without editing server files.
Handling the WWW Subdomain
Decide whether to use www or non-www for your website. Search engines view these as separate sites, so consistency is important for SEO. Most modern websites use the non-www version (example.com instead of www.example.com).
Whichever version you choose, set up proper redirection for the alternate version. This step ensures users reach your site regardless of which version they type.
In WordPress, configure this setting under Settings → General. Enter your preferred domain format (with or without www) in both the WordPress Address and Site Address fields.
Additionally, set up 301 redirects to send traffic from the non-preferred version to your preferred version. This approach consolidates your domain authority and prevents duplicate content issues.
Troubleshooting Common Connection Issues
Even with careful planning, issues can arise during domain connection. Knowing how to identify and fix common problems will minimize downtime and frustration.
DNS Propagation Delays
DNS changes aren’t instant. They spread gradually across the internet through a process called propagation. During this time, some visitors might see your old site while others see the new one.
DNS changes typically propagate within a few hours but can take longer. This variation depends on internet service providers and local DNS caching settings. Be patient during this period.
To check propagation status, use online DNS checker tools that test from multiple global locations. These tools show which DNS servers have updated and which still show the old records.
If propagation seems stalled after 48 hours, verify your DNS settings. Check for typos or configuration errors that might prevent proper updates.
SSL Certificate Problems
SSL certificates ensure secure connections to your website. When changing domains, certificate issues commonly arise, causing security warnings for visitors.
After connecting your domain to WordPress, immediately install an SSL certificate if one isn’t automatically provided. Many hosting companies offer free certificates through Let’s Encrypt.
SSL implementation prevents mixed content errors that occur when secure and non-secure elements appear on the same page. (Source: WPMU DEV)
If visitors see security warnings, verify that:
- Your SSL certificate is properly installed
- WordPress settings use https:// URLs
- All content (images, scripts, etc.) loads via https://
- Redirects properly send traffic to the https:// version
WordPress plugins like Really Simple SSL can help automatically fix many common SSL issues after domain connection.
Mixed Content Warnings
Mixed content warnings appear when a secure page loads some resources (like images or scripts) through insecure connections. These warnings hurt user trust and can block certain content from loading.
To fix mixed content warnings:
- Install a plugin like Better Search Replace
- Search for http:// references in your database
- Replace them with https:// versions
- Update hardcoded links in your theme or widgets
- Check external resources like fonts or scripts
Use your browser’s developer tools to identify specific mixed content issues. The console tab will display detailed errors pointing to problematic resources.
For persistent issues, consider using a plugin like SSL Insecure Content Fixer, which automatically detects and fixes mixed content problems.
Post-Connection SEO Safeguards
Domain connection can affect your search engine rankings if not handled properly. Implementing specific SEO safeguards helps preserve and even improve your search visibility during the transition.
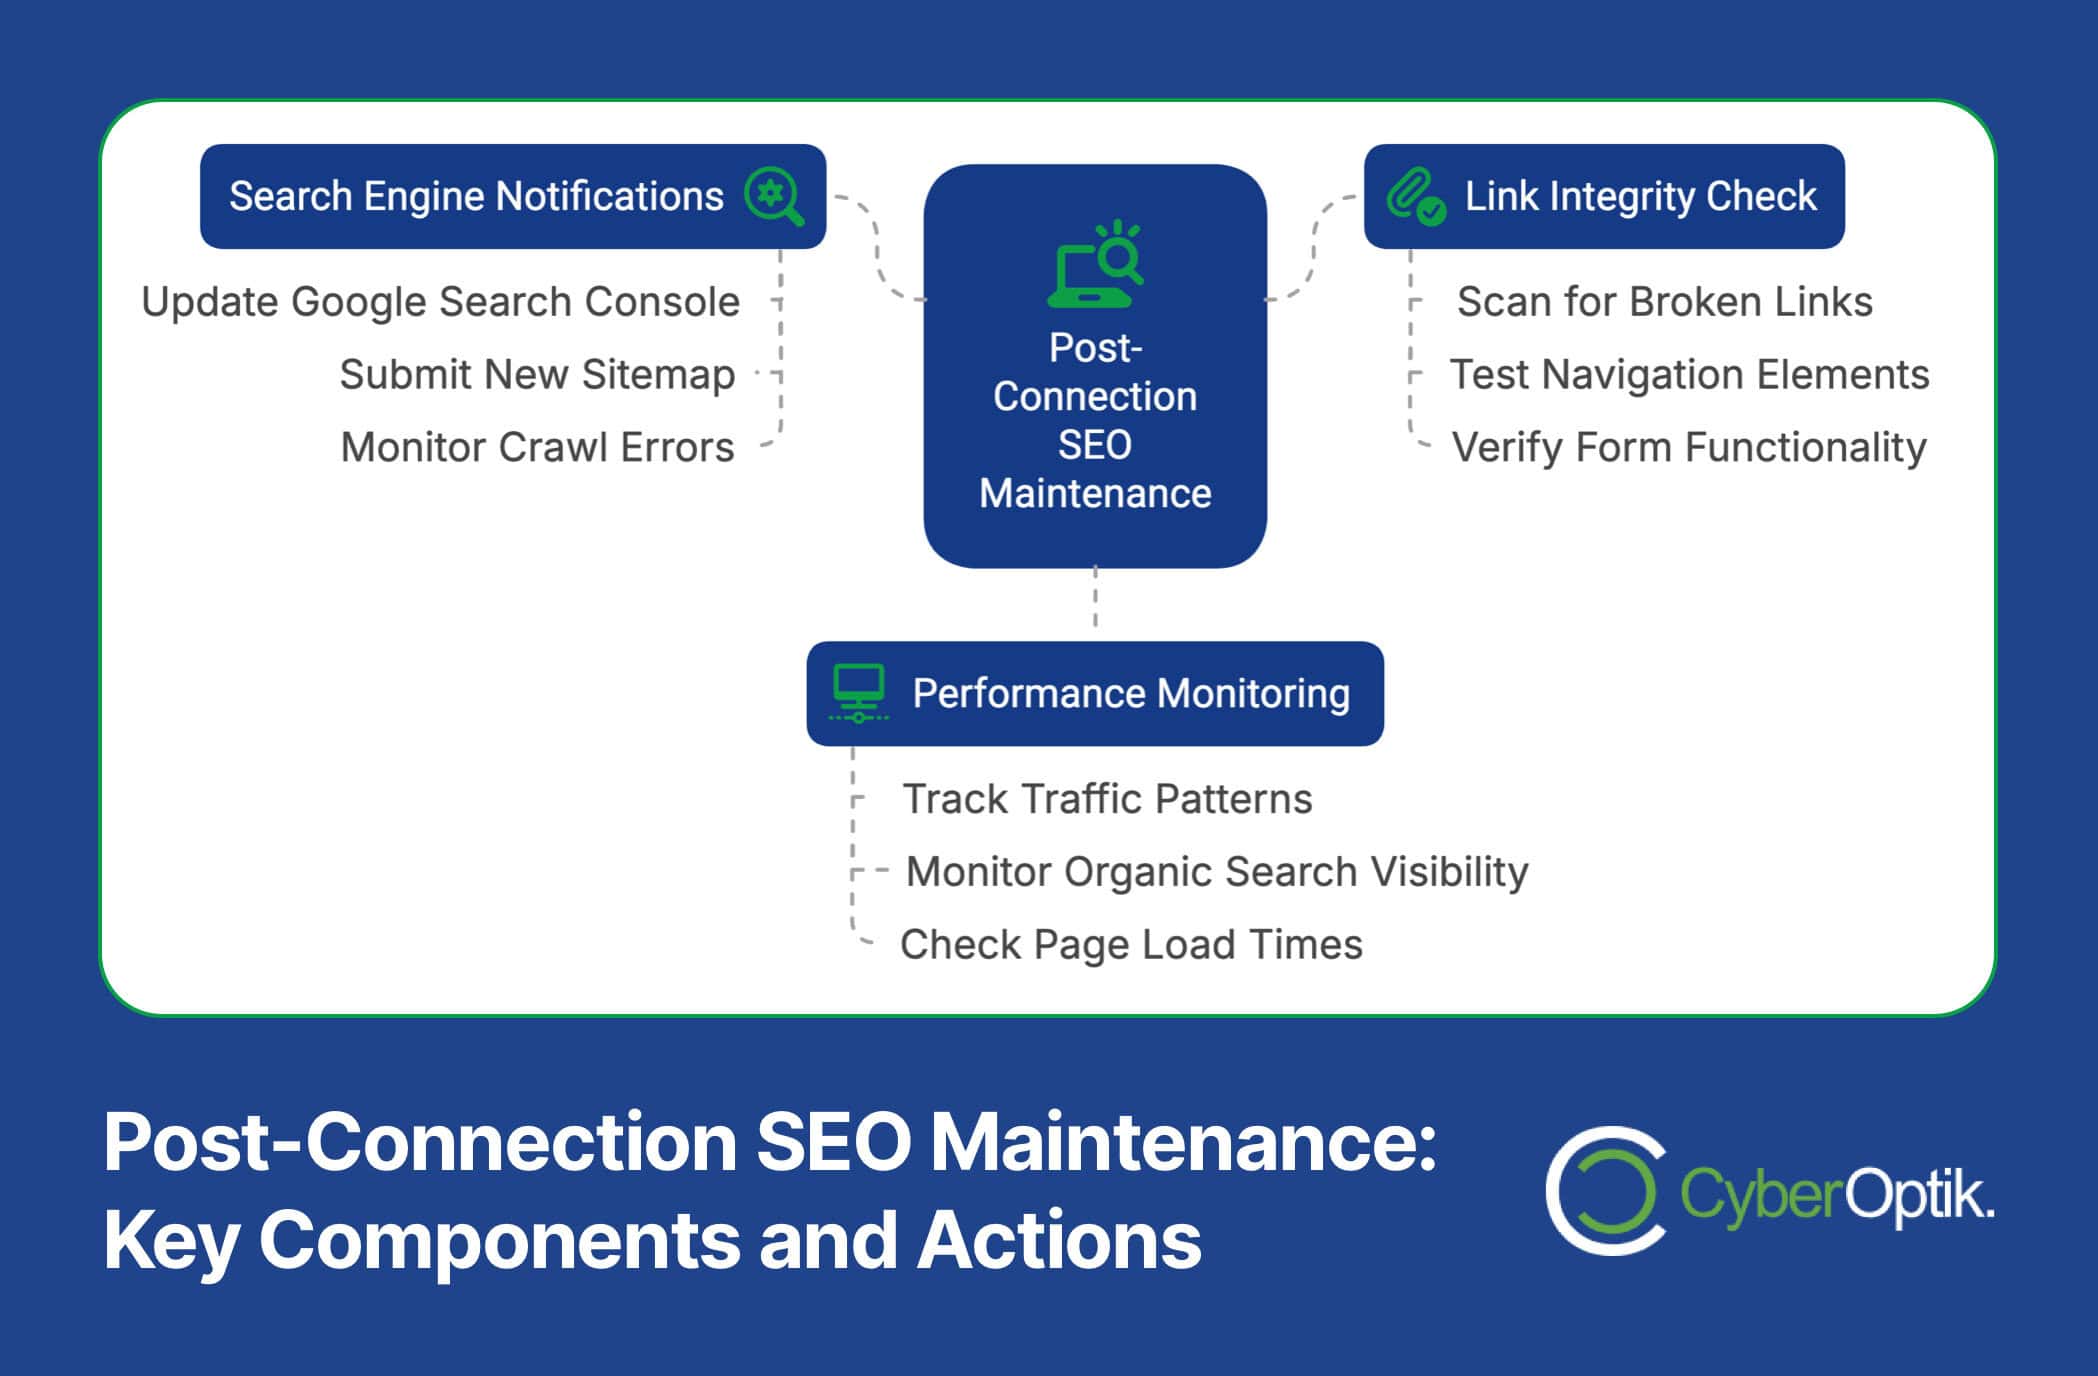
Updating Your Google Search Console
Google Search Console lets you monitor and maintain your site’s presence in Google search results. After connecting your domain, update your Search Console properties immediately.
To properly update Search Console:
- Add your domain as a new property if not already present
- Verify ownership through your preferred method
- Submit your new sitemap.xml generated by WordPress
- Use the “Change of Address” tool if you’ve changed domains
- Monitor for crawl errors or indexing issues
Pay special attention to any crawl errors reported after domain connection. These errors highlight pages that Google couldn’t access, which could indicate redirect problems.
Google Search Console data helps you verify that search engines are properly processing your new site structure. Watch for changes in impressions or click-through rates that might indicate SEO issues.
Checking for Broken Links
Broken links hurt user experience and SEO. They commonly occur during domain migrations when page URLs change or content gets reorganized.
The Broken Link Checker plugin for WordPress identifies post-migration issues by scanning your entire site for problematic links. This systematic approach catches problems that manual testing might miss. (Source: Shopping Cart Migration)
Beyond using plugins, conduct these additional checks:
- Test navigation menus to ensure all links work
- Check sidebar widgets and footer links
- Verify that form submissions work correctly
- Test social media sharing functionality
- Check multimedia content like videos and audio
Fix any broken links immediately to prevent visitors from encountering errors. Update internal links to use your new URL structure and verify all external links point to valid resources.
Monitoring Traffic Changes
Closely monitor your website traffic after connecting your domain. Significant drops may indicate technical problems or SEO issues that need addressing.
Set up proper analytics tracking before connecting your domain. Google Analytics or equivalent tools should be configured on your WordPress site in advance. This preparation ensures continuous data collection during the transition.
Pay special attention to these metrics:
| Metric | What It Tells You | Potential Issues |
|---|---|---|
| Overall traffic | General site visibility | Major DNS or redirect problems |
| Organic search traffic | SEO health | Indexing issues or ranking drops |
| Bounce rate | User experience | Broken pages or poor navigation |
| Page load time | Site performance | Server configuration problems |
| 404 errors | Missing content | Incomplete redirects |
Compare traffic patterns before and after the domain connection. Some fluctuation is normal, but significant drops warrant investigation. If you notice concerning changes, check your redirects and search console data for insights.
Should You Transfer Your Domain Instead?
While domain connection works well for many websites, transferring your domain completely to your WordPress host or another registrar offers additional benefits. Let’s examine when transfer makes more sense than connection.
Benefits of Complete Domain Transfer
Domain transfer provides several advantages over simple connection:
- Centralized management of your website and domain
- Single billing provider for hosting and domain services
- Often better pricing for renewals
- Access to additional domain features through your new registrar
- Simplified technical support when issues arise
These benefits become more valuable over time. While connection is faster initially, transfer offers better long-term management. Many of our clients eventually transfer their domains after initially connecting them.
CMS2CMS and similar services automate page and image transfers from Wix to WordPress, making full migration easier, though these are paid services separate from domain transfers. (Source: WP Engine)
The Domain Transfer Process
Domain transfer involves more steps than connection but provides complete ownership transition:
- Verify eligibility (domains must be 60+ days old and unlocked)
- Disable privacy protection temporarily
- Obtain authorization code (EPP/transfer key) from Wix
- Initiate transfer at your new registrar
- Approve transfer emails
- Wait for transfer completion (typically 5-7 days)
- Configure DNS at your new registrar
The transfer extends your domain registration by one year (added to your current expiration date). This extension makes the transfer fee worthwhile if your renewal is approaching.
Your website remains accessible throughout the transfer if you’ve already connected it to WordPress using the methods described earlier in this guide.
When to Choose Transfer Over Connection
Consider domain transfer instead of connection in these situations:
- You’re fully committed to WordPress for the long term
- Your domain renewal is approaching (within 90 days)
- You want to consolidate services with one provider
- Your current registrar charges high renewal fees
- You need advanced domain features not offered by Wix
If you’re unsure about WordPress or want to test it before fully committing, start with domain connection. You can always transfer later after confirming WordPress meets your needs.
How does migrating from other platforms compare to moving from Wix? While the technical steps differ slightly, the principles remain similar. Focus on preserving content, maintaining SEO, and ensuring a smooth user experience regardless of your original platform.

Conclusion
Connecting your Wix domain to WordPress doesn’t have to cause downtime or traffic loss. With proper planning and execution, you can make the transition smoothly while preserving your site’s search rankings and user experience.
Remember these key points for a successful domain connection:
- Fully prepare your WordPress site before connecting your domain
- Create a detailed migration plan with specific steps and timeline
- Implement comprehensive redirects to preserve traffic and SEO
- Monitor your site after connection to quickly address any issues
- Consider eventual domain transfer for long-term benefits
The flexibility and scalability of WordPress make it an excellent platform for growing websites. By successfully connecting your Wix domain, you’ve taken the first step toward leveraging these advantages for your online presence.
Need help with your domain connection or WordPress migration? Our WordPress migration services provide expert assistance throughout the process, ensuring a smooth transition with minimal disruption to your online presence.